Low-poly art: geometry, flat shading and simple forms
Published
Low-poly art builds objects from a small number of flat faces. The outline shows the shape; broad surfaces and color changes make it look solid. Start with a simple rock. Change its shape, shading and light one at a time to see what each does.
On this page
Keep shape, shading and texture separate
A polygon is a flat shape with straight sides. A mesh joins these faces to make an object. Shading controls how light looks on its surface.
The Three.js material documentation lets you choose flat shading, which gives each face a clear edge. It also compares two surface maps: a normal map changes the light, while a displacement map moves vertices, the mesh’s corner points.
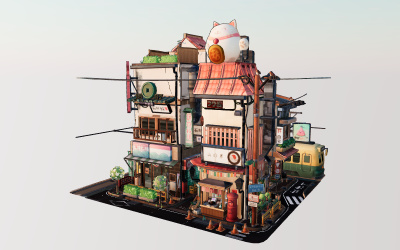
Keep the outline fixed while you compare flat and smooth shading. Flat shading reveals separate faces; smooth shading blends the lighting across them. Explore the Three.js Littlest Tokyo example, with a model by Glen Fox, as a finished scene.
| Variable | What you change | What to inspect |
|---|---|---|
| Geometry (shape) | The number and positions of corner points and faces | The outline and main flat surfaces |
| Shading | How light travels across those faces | Sharp changes or smooth light across the surface |
| Texture | An image wrapped around the surface | Painted detail and the scale of its pixels |
Start with the fewest faces that preserve the shape your image needs. A small pixel texture can change the surface without reducing that face count. Compare this with Silicon Dreams, where early computer-made images use smooth reflections and strange spaces.
Begin with a rock and a clear outline
Start with an icosahedron, a solid with 20 triangular faces. In Three.js, IcosahedronGeometry keeps that base form at detail: 0; higher values add corner points. In a modeling editor, choose the same basic shape with no extra faces. Reduce its height to roughly two-thirds of its width. Move two or three top corner points sideways so the sides no longer match.
Give the rock one broad base and a narrower upper area. This makes it look stable. Rotate the model slowly and look for a distinctive outline from the viewpoint you intend to use in the finished image.
A flattened side can suggest a resting surface. A sharper upper edge can catch light. Those decisions give the form character before you add materials.
Use faces to direct attention
Switch to flat shading and move the light. Watch which faces brighten together and which become darker. This shows which way each flat face points and how large it is.
Change the shape if a face breaks the outline awkwardly. Change the light if the shape works but no part stands out.
Make color support the form
Choose three related colors: a main tone, a lighter accent and a darker base. Apply them to groups of faces. A group of faces in one color can look like a different material or draw the eye along one side.
Start with broad areas. Small separate color patches can distract from the outline, so give each patch a clear role. For a rock, one large light area and a darker underside may be enough to make it look solid.
View the finished image at a small size. If the object remains clear, try it against both a light and a dark background. Check where the rock’s edge blends into each background.
Save a comparison you can judge
Save two images of the same model with identical camera and light positions: once with flat shading and once with smooth shading. Put the images side by side at the same size. If the outline looks wrong in both, edit the model’s shape. If only the surface feels wrong, revise the shading or light.
The Three.js material guide separates how an object looks from the shape of its mesh.
Build a small matching collection
Make three rocks with different outlines but the same colors and lighting. Arrange them as a group and check whether each contributes a distinct shape.
You can apply the same approach to trees, buildings or simple props: establish the outline, place broad faces and colors, then choose a viewing angle. For another exercise in making a few marks carry a strong idea, try our pixel-art tutorial.
Explore related styles in the 90s and 2000s aesthetics collection.