Cassette futurism: tactile controls and analogue design
Published
Cassette futurism imagines advanced machines with physical controls and tapes you insert by hand. A future recorder might have a cassette door, a row of switches, a level meter and labels that tell the user what to do.
On this page
Sony’s WM-2 and Ron Cobb’s film design give you two starting points: a portable player built for a hand and a fictional machine built to suggest a working world.
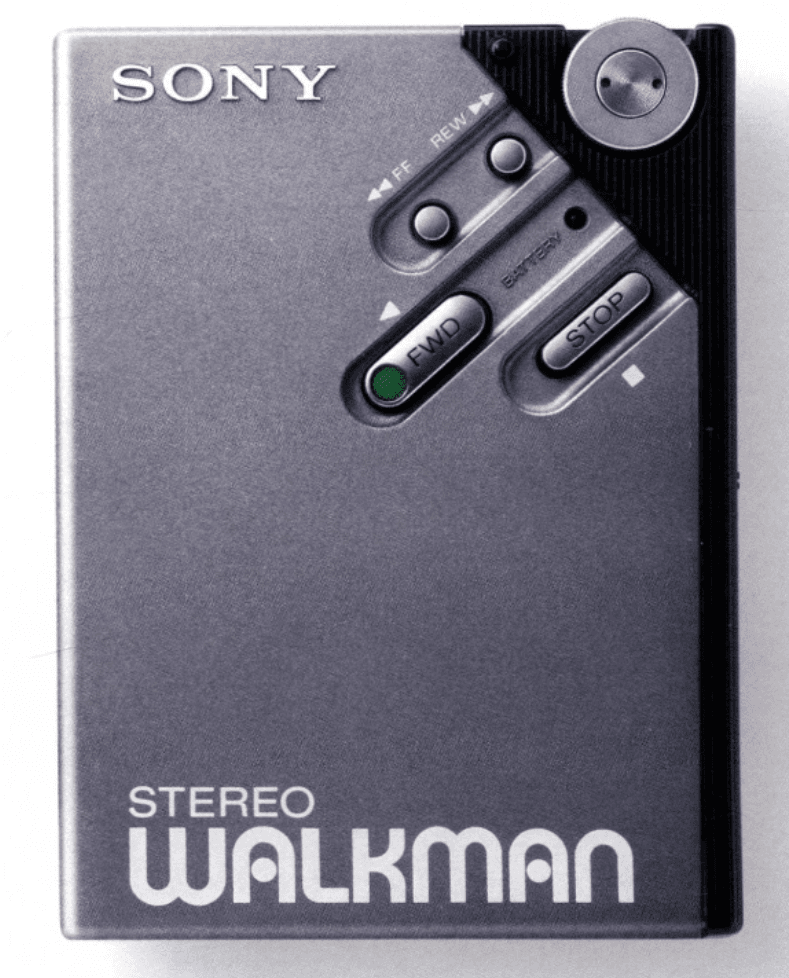
Study Sony’s WM-2 cassette player
Sony’s design archive for the WM-2 dates the cassette player to 1981. Its account describes a direct-drive mechanism, driven straight from the motor, and controls moved to the front.
Study the relationship between the cassette compartment, controls and body. Look for the parts that need fingers, the parts that need clear labels and the parts that protect the mechanism. Each has a practical reason for occupying space.
Follow a film designer’s contribution
The Television Academy’s Ron Cobb record connects his design work with the Nostromo in Alien. The AFI catalog credits him as a concept artist on the 1979 film.
When you study a screen image or a documented drawing, ask what the setting shows about how people use and repair the machine, and how big it is. A panel’s controls can suggest its job before a character explains it.
Carry that question into your own object. Decide who uses the machine, what they need to read quickly and which actions they perform most often.
Compare the physical cues
A real player’s controls must fit its mechanism and the listener’s grip. A film prop also needs to communicate its role in a scene. In each, compare the tape compartment, display and controls before looking at surface decoration.
This family reaches into the 1970s and 1980s. Clear Tech looks at later, partly see-through cases; skeuomorphism uses familiar objects to explain screen controls.
Give every control a job
Write a single sentence describing your invented machine. For a tape recorder that saves short audio reports, include a tape compartment, play and stop buttons, and a sound-level display.
List the actions in their likely order: insert a tape, set the sound level, start recording, stop, then play back. Group the controls around that sequence. Give the most important action a clear position and make related controls feel like a family.
Choose labels that name an action or setting. “Record”, “Stop” and “Level” tell a user more than a row of unexplained symbols. You can add symbols after the layout already communicates its purpose.
Build material contrast into the layout
Use a small set of materials. Use a dark case and a lighter panel around the controls. Make an important button stand out with a different color.
Leave a visible boundary around each control. A button needs enough space for a finger; a label needs enough contrast for a quick glance. Small screws, panel joints and vents can support the imagined construction when you put them where the machine would need them.
Start with clean shapes. Add wear according to use: a frequently touched edge can look smoother, while a recessed label can remain crisp. This pattern of wear makes the machine look used.
Design the screen and case together
A small display can concentrate attention on a few useful values. Choose what the user needs to see: recording time, space left on the tape or sound level. Keep each value in the same place so changes are easy to spot.
Test the display as part of the whole object. The screen’s size, viewing angle and position should support the physical controls nearby.
Make a convincing first study
Draw a front view of your machine with six or fewer main parts. Label each part and explain its purpose in one short phrase. Then sketch a side view to check depth, grip and access to the tape compartment.
Show the design to someone and ask them to describe how they would use it. Revise the part that needs the longest explanation. Check that a finger can reach each drawn button and that the side view leaves space for the cassette door to open.
Explore related styles in the 90s and 2000s aesthetics collection.