Mac screensavers: photos, folders and a hot corner
Published
A Mac photo screen saver can show your own pictures or geometric artwork. Put the finished images in one folder and choose it in Screen Saver settings. To start the saver by hand, add a hot corner: a screen corner that starts an action when you move the pointer there.
On this page
The original pack below supplies three dark pictures with teal, pink and gold shapes. Their wide layouts leave room for the slideshow to move and crop them.
Prepare the folder
Download the Mac screen-saver pack, unzip it and move the three PNG images into a lasting folder in Pictures. Each image measures 1920 × 1080 pixels.
Open them in Preview before applying the saver. Keep test images elsewhere until you want them in the sequence. The saver uses all the images in the folder you select.
Select the images and style
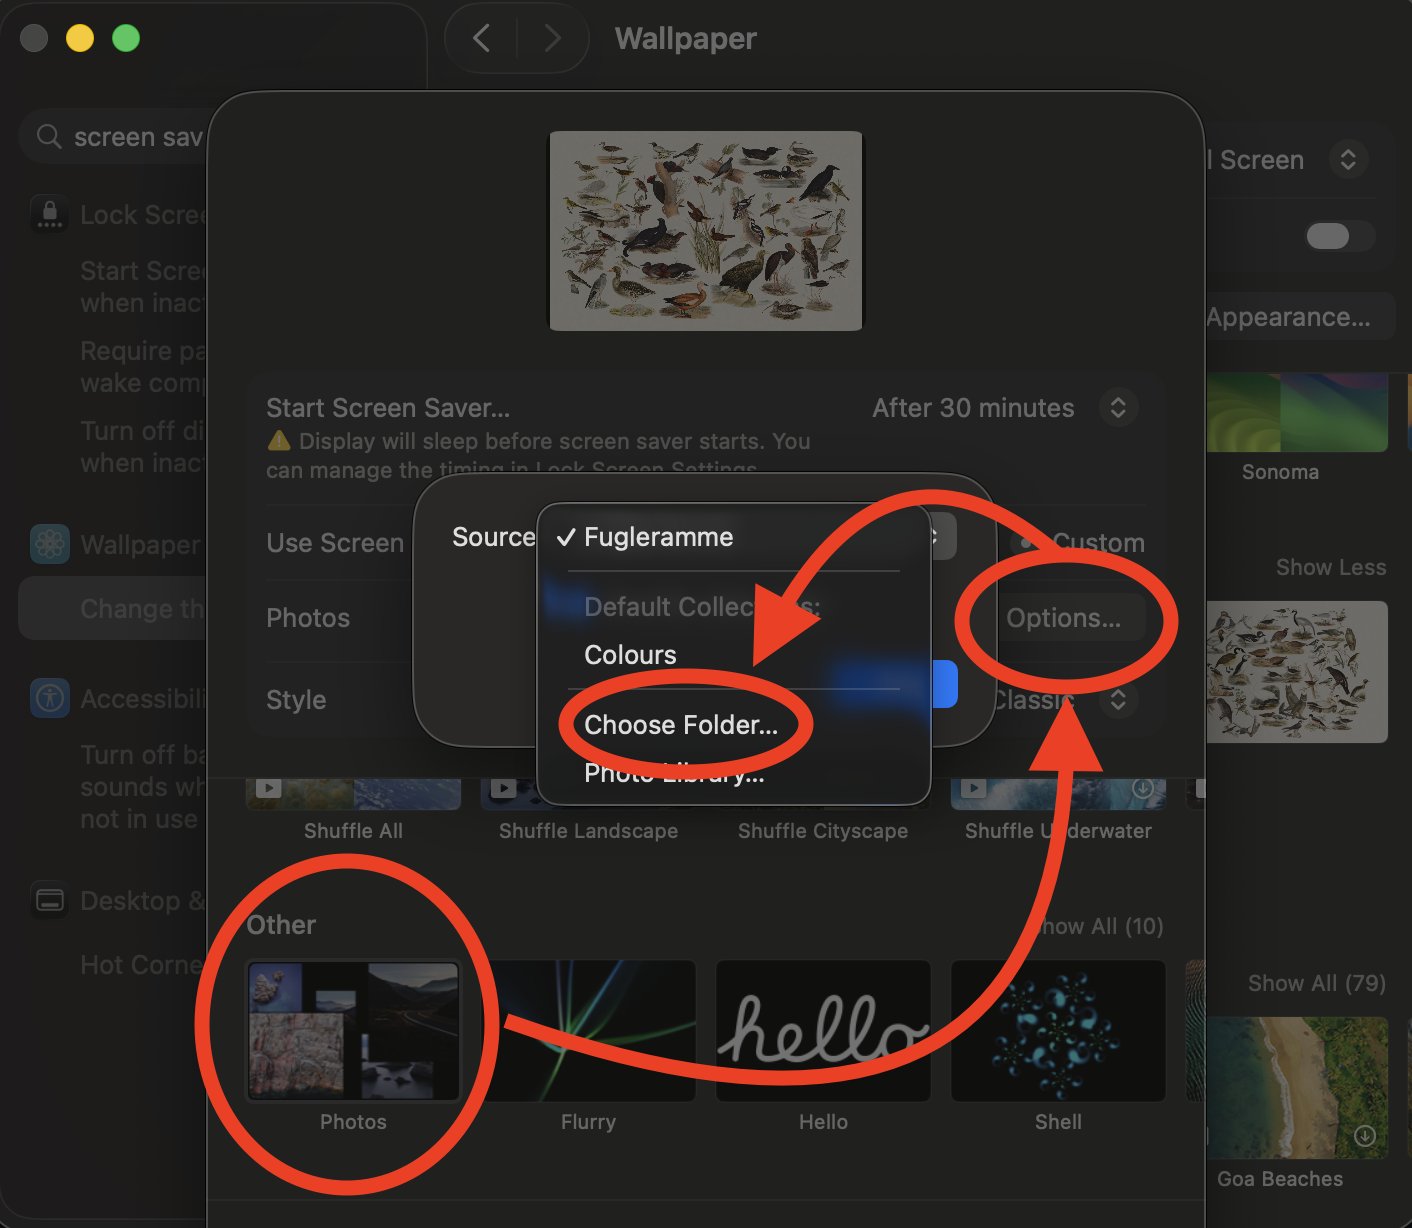
Apple’s current screen-saver guide puts Screen Saver under System Settings → Wallpaper. Follow Custom → Other → Photos → Options → Choose Folder and select the unzipped images. Choose a Style, then confirm with OK.
The photo-saver instructions also explain how to choose a Photo Library. If your Mac shows different settings, choose your macOS version in the guide.
Watch one picture change to the next in the preview. If the movement cuts off a key object, choose a style with less movement or place the object nearer the center of a larger image. Put a small pixel character on a larger background before using it full-screen.
Start the saver with a deliberate hot corner
Open System Settings → Desktop & Dock → Hot Corners. Choose a corner’s popup menu and select Start Screen Saver.
To require a key as well as the corner movement, hold Command, Shift, Option or Control while you open the popup menu and select the action. Then choose Done. Apple’s hot-corner guide explains these key choices.
For example, assign Command plus the upper-left corner. Moving the pointer there normally will not start the saver. Hold Command while moving to that corner to start it.
Coordinate idle and sleep settings
Use the settings worksheet to record the image folder, style, hot corner and start time. Keep screen sleep and sign-in timing in their separate rows.
For a saver set to start after five minutes, set screen sleep later so the display stays on long enough to show it. Check the Mac’s Lock Screen settings to choose whether you must enter a password when you return.
Preview on the monitors you normally use and check the crop. To change the saver later, replace or add finished images in the same folder and preview the new sequence.
The 90s screensaver guide explores the pipes, mazes and patterns that keep making new shapes from a few rules.